| Secrets of Digital Photography Nikon 995 Wireless Flash Transmitter |
|
Jump back to Breaking News... The technique outlined here is for you to build on your own. It takes a certain amount of skill and trust in your own abilities to work with small metal wires to shape this "spar" well enough to work. Don't try it if you have any qualms at all. You could scratch or damage your flash housing if you got it wrong. No warrantee is expressed or implied. |
 T E C H N I Q U E
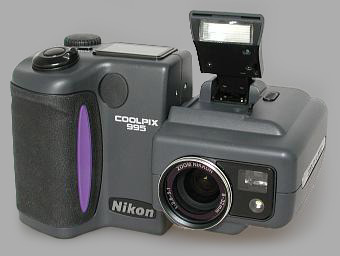
As the 995 grows in popularity, people will want the camera to do the wireless slave flash trigger technique first seen on these pages over a year ago. Nikon has given the 995 a nice boost towards that realization because the new flash has a pair of indentations that make mounting the IR filter relatively easy. Those two horizontal slots above the flash tube are about to make converting the camera into an IR transmitter a piece of cake, easy as pie and simple as changing the piston rings on V8! Well, perhaps not that hard. The filter material is easy to come by. It's a sliver of unexposed, developed, (black) slide film turned emulsion side away from the flash*. Slide film is designed to let projection lamp heat pass through without being absorbed. Visible light is absorbed, so don't expect much light from the camera. It's flash exposure distance has just been cut to about two inches! Our tiny modification is not permanent. So how do we turn our 995 into a wireless flash transmitter? A picture is worth a thousand explanations:
The wire cutters left a naturally rough end at the clipping point. That unfinished surface helps dig slightly into the plastic inside the groove. The pin wire used for cheap badges, political buttons and ID tags may be softer and easier to work with. The wire is clipped a micro millimeter too long, in order to bridge from one end of the grooves to the other, and needle nose pliers will be needed to spring it into place. Careful, you don't want to scratch the plastic! The arc of the metal spar will need to be shallow, and if its shape lifts upward from the grooves toward the top of the flash carrier, the flash won't close. The one pictured here closes just fine. Notice how it dips lower in the middle of its arc. It took a couple of adjustments to get it right. The hard part is getting the arc of metal and the length of it just right. By making the metal about 1/10 of a millimeter too long for the span between groove seating points, you can "spring" the wire ever so slightly by holding it in the very tip of small or needle-nose pliers.
Now cut
a piece of the slide film to size and bevel-cut the top corners
slightly to fit under the emerging parts of the spar. To flash normally, slip the film out. The arc of metal does not contact the plastic all the way across the center of its span, what holds it in place is its being wedged into the edges of the arc. The bevel area will show some denting where contact has been made. Replace it for IR use. Notice that the film does not cover the sensor below the flash tube. Tests with several slave flash units and triggers worked quite well. It's not uncommon to trigger units up to 20 feet away. I don't think Nikon had these grooves created to hold an IR filter, because they are V-shaped internally and don't have an internal purchase for an add-on piece of plastic. The point of the safety pin and the rough opposite end of the clipped metal hold the spar in place because they dig slightly into the plastic. If you make one, be very careful. Better to try several times grinding or clipping the end of the shaft to size, only to find it's a tad too short, than to try to force one in that is too long. I'm not responsible for your craftsmanship but I wish you good luck. Safety pin wire is quite tough. Probably too tough. Look for milder metal. You may need two pair of needle-nose pliers to work the careful angles to create this subtle arc, but once you get it installed, it will likely never need to be removed. Try not to use any metal that can rust. You wouldn't want a raindrop in October to stain the camera a week after it got slightly damp. -iNova *Turning the emulsion away from the tube prevents any dye in the emulsion to vaporize harmlessly forward if the flash were to heat it enough. No instances of having dye vaporize backwards onto the flash cover have been reported with slide film facing back (one person reported that color negative film may deposit color on the tube), but by pointing the emulsion away from the flash tube nothing can go wrong, go wrong, go wrong...
|
|
 IR Flash!
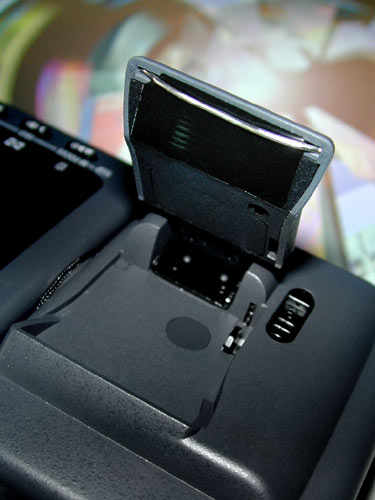 That
metal spar you see bridging the two grooves was cut from a medium
size safety pin with a small diameter wire. The pointy end is
on the left.
That
metal spar you see bridging the two grooves was cut from a medium
size safety pin with a small diameter wire. The pointy end is
on the left.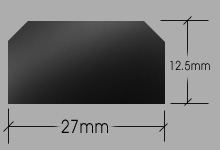 It
should lay flat and secure open or closed. These dimensions work
for me. Your bevel cuts will depend on the actual shape you achieve
with your spar.
It
should lay flat and secure open or closed. These dimensions work
for me. Your bevel cuts will depend on the actual shape you achieve
with your spar. Get
the eBook
Get
the eBook